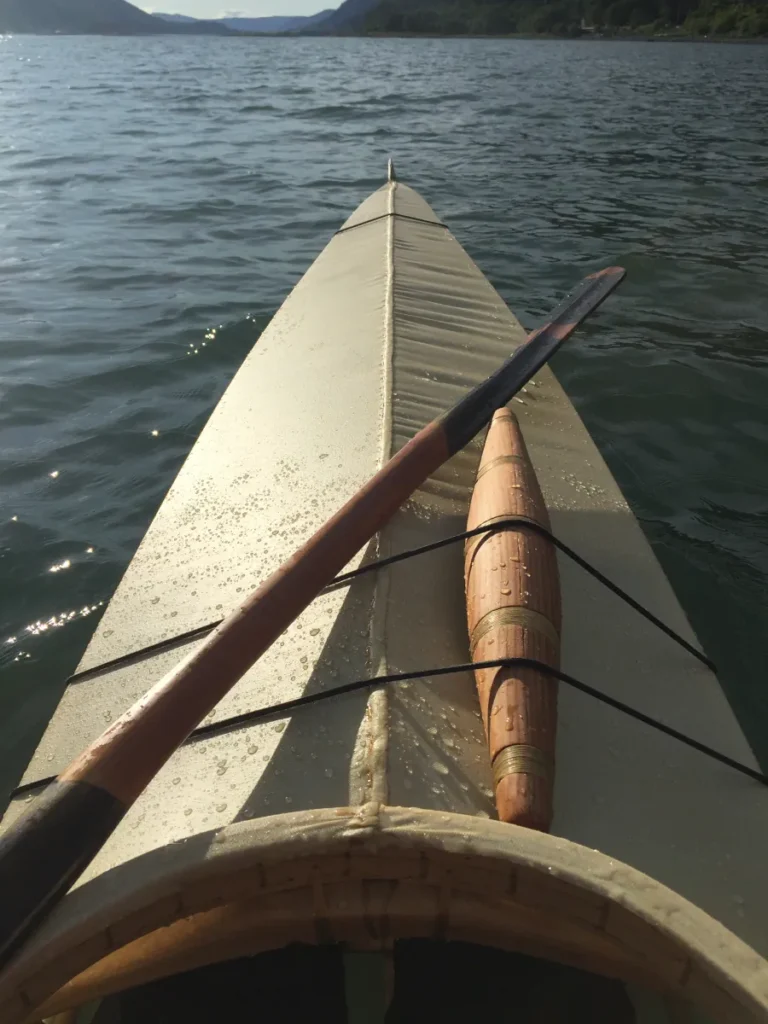
A traditional style kayak suction bailer is simple, effective, and easy to make. It is used to suck the water out of your kayak using lung power. The bailer is basically a hollow tube made out of wood–like a straw that is wide in the middle.
These bailers were used by several Native cultures in Alaska according to the provenance of some historical examples I’ve seen in museums. In Unangam Tunuu a bailer is called a chxuusix̂ according to “Aleut Dictionary” by Bergsland. I don’t yet know the name in other languages. My grandmother was from Kiŋigin (Wales) and could speak Inupiaq–the Bering Strait dialect spells it Inupiaq instead of Iñupiaq–but I never heard her speak more than a few words.
The traditional bailer has some advantages over the contemporary plastic type. It fits between the kayak ribs while a plastic type may not. It works one-handed so you can keep holding your paddle. It isn’t made of plastic. Also, there is a mystery to it: people always want to know what the bailer is and are astounded by the simplicity and how well it works.
The disadvantage is that the traditional bailer does not suck out as much water as quickly as the plastic type which is better for de-watering after a capsize. And sometimes you get a taste of salty water with the wooden one. I take both types on trips, but I use the suction bailer much more often than my plastic one.
Materials
- Wood. Clear, straight grained, knot free. About 24″ (60 cm) long and approximately 3½” (9 cm) thick. An untreated scrap of 4×4 dimensional lumber works well. Grain direction doesn’t matter. Species isn’t very important.
- String, tarred twine, sinew, artificial sinew, etc. I used waxed nylon artificial sinew from the Skinboat Store but any string or line will do.
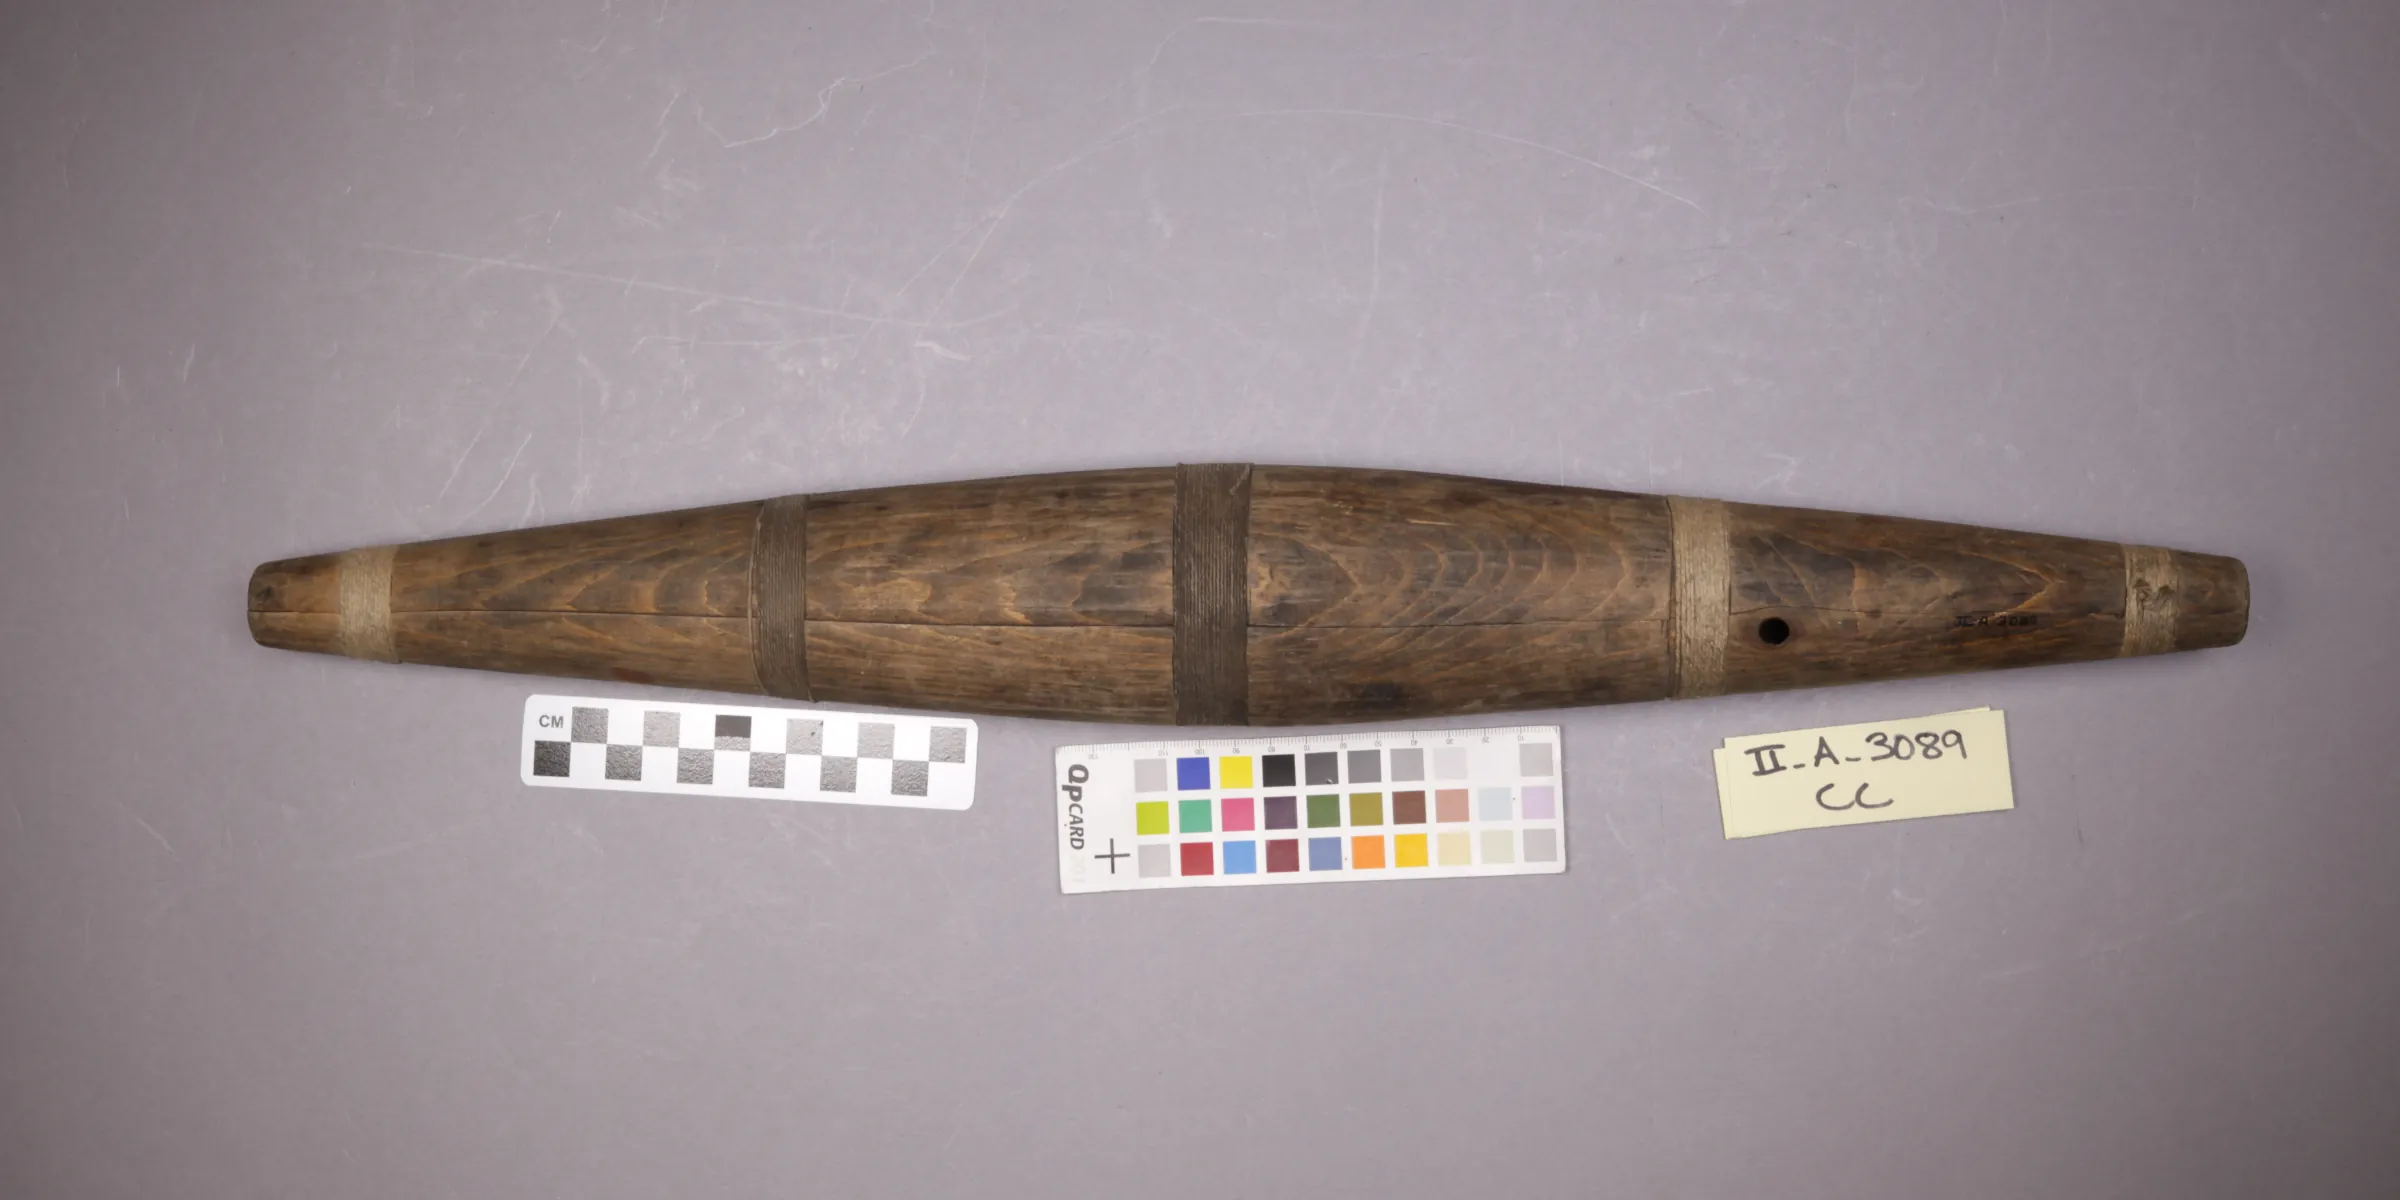
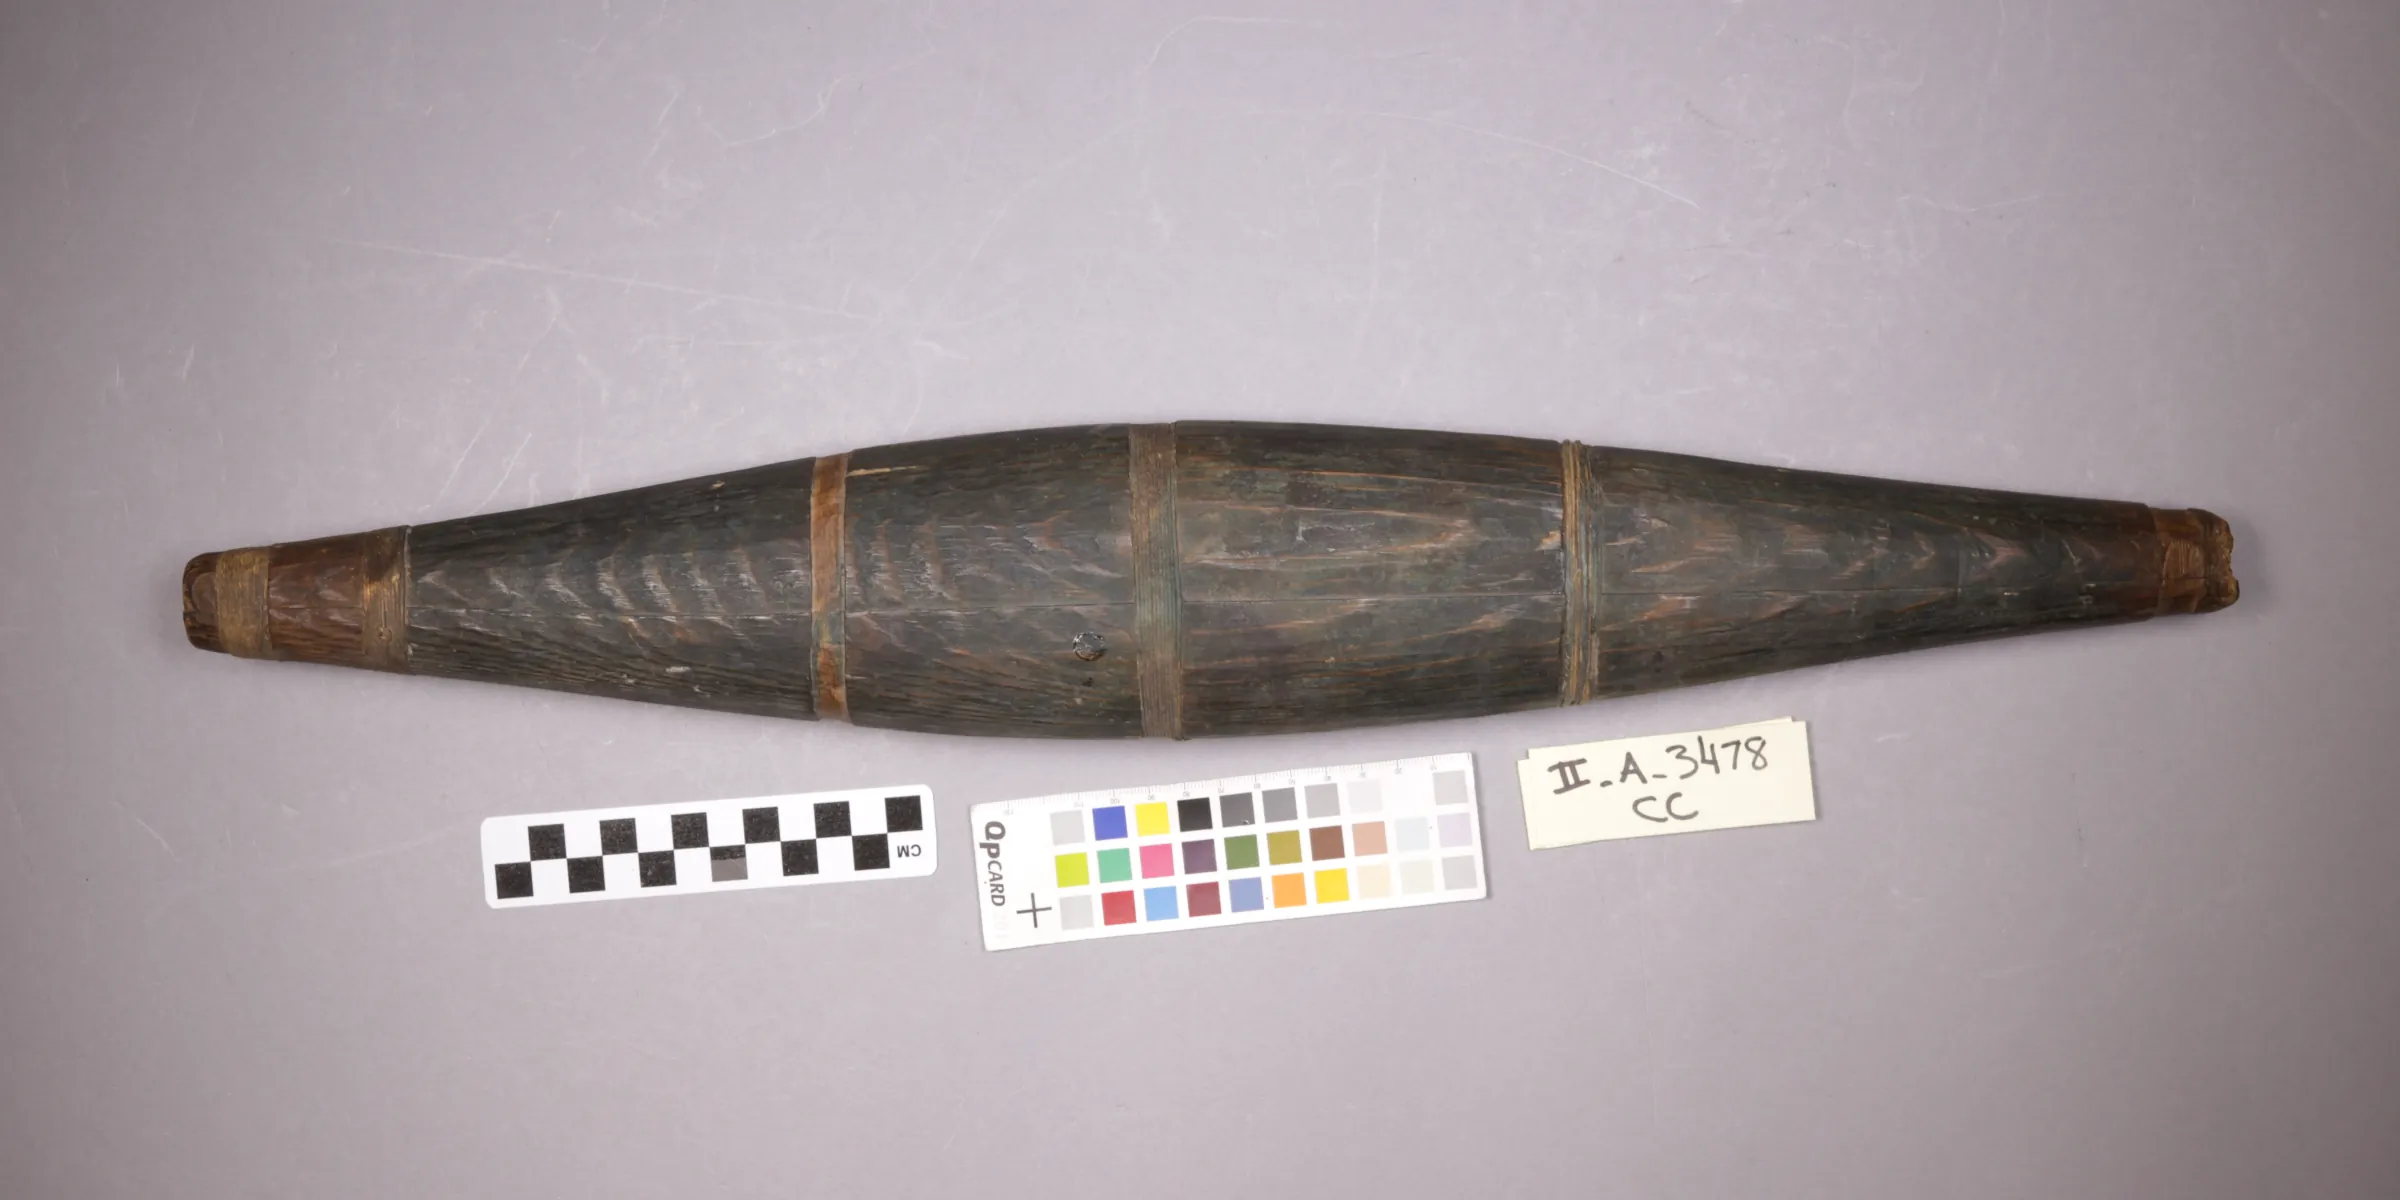
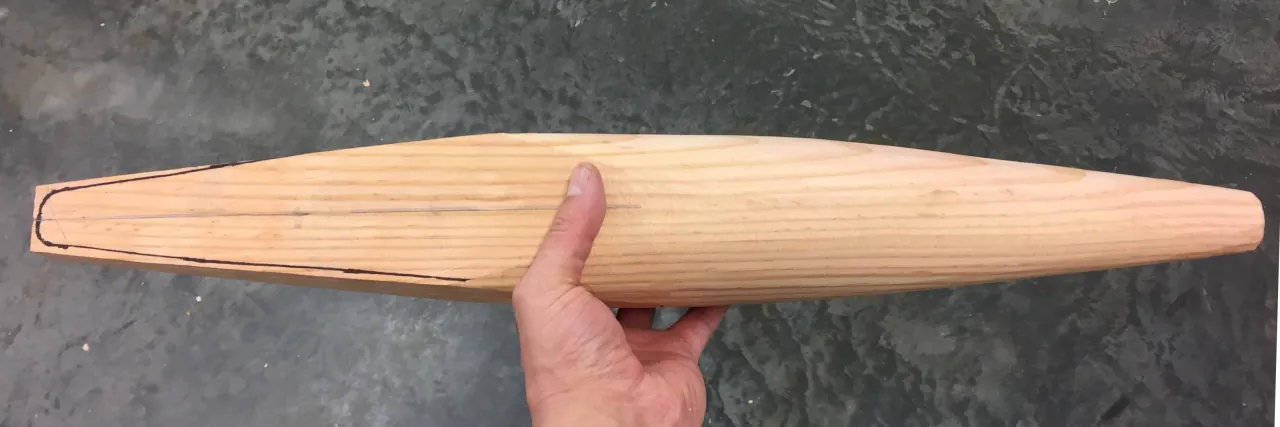
- Bailer template, a tracing of II-A-3478 from the Alaska State Museum as shown in the image above.
Tools
- Bent knife, gouge, scorp/inshave, grinder attachment, or any tool to make a concave surface to hollow the inside. I used a Hirsch 25mm bent gouge and a homemade bent knife. North Bay Forge makes nice bent knives.
- Drawknife or bandsaw for rough shaping. I used an old Greenlee drawknife from Jim Bode Tools (or search eBay) for $50, but it was beat up and needed extensive sharpening. Sean Hellman makes nice drawknives.
A faster but less traditional method is to use a wood lathe if you’re into wood turning. - Spokeshave (optional) and sandpaper (optional) for smoothing into final shape.
- Saw to cut the wood in half lengthwise. Bandsaw or handsaw will work. I used a Z-Saw H-250 rip saw direct from Japan on eBay.
- Water resistant glue (optional). Such as Titebond III, West Systems epoxy (expensive & messy), or Gorilla Glue (messy). Or experiment with pitch, sap, pine tar, fish eggs, blood, hide glue, boiled fish skin, etc.
Directions

- Sit in your kayak. Learn forward a little and measure the distance between the bottom of the kayak and your chin. This will be the length of your bailer–whatever distance feels most comfortable. A typical length for a kayak might be around 18-22″ (46-56 cm). If you see a giant one it may have been for an open skin boat such as an umiak, niĝilax̂, or angyaaq.
- Cut the wood to length. If one end has checks or cracks cut off the cracked end.
- Mark center lines on each end of the wood (the ends where you can see the rings).
- Connect the centerlines on one of the long sides of the wood. On this same side trace the bailer shape (download template). The small ends of the bailer are about 1″ (2.5 cm) wide. The center is about 3 ½” (9 cm) wide. Use a bandsaw or drawknife to rough out the shape.
- Repeat step #4 on one of the freshly cut sides. You should now have an elongated football shape with square edges.
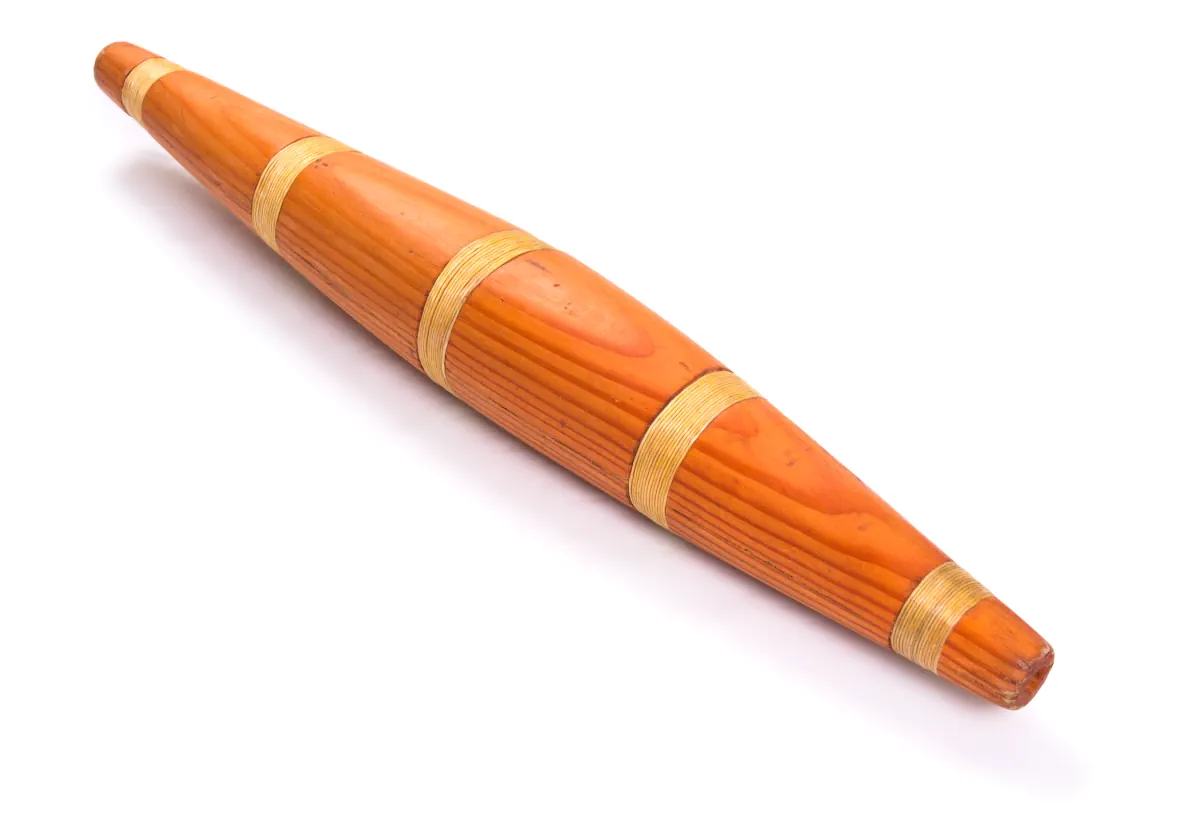
- Smooth out the corners and work to the final shape. I used a drawknife and spokeshave. See image above. Sand smooth if you like. I don’t like sanding.
- Whittle 5 evenly spaced bands around the circumference of the bailer. Depth of each band should be about the thickness of your string. Width of each band can be the width of your thumb.
- Optionally color your bailer. Traditional colors are typically black (soot, charcoal), white (lead white [toxic], barium sulfide) red (ochre), blue (vivianite), and green (celadonite). Simply make a paste of water and pigment then paint it on. Allow to dry and wipe off excess.
You can apply a coating of finish if you like, such as tung oil, but be aware that oil based finishes may turn your pigment colors a much darker shade, especially vivianite. I’m guessing they were typically not finished with anything. Perhaps to facilitate wood swelling to tighten the bailer. - Connect centerlines on two of the long sides. This will be your cut line. Patiently and accurately cut in half lengthwise with a bandsaw or handsaw made for ripping. Cut completely from one end to the other. Don’t try to meet in the middle. My first bailer didn’t have a nice clean cut so I had to use glue.
Alternatively, your can try splitting the wood lengthwise (riving) with a hatchet, large knife, or a small froe. I would only recommend this if you have some experience with splitting, or if your wood is known to be easy to split such as oak or other ring porous woods. - Trace approximately ¼” (0.5 cm) around the outside edge. This will be the thickness of the bailer walls. Doesn’t have to be perfect.
- Hollow out the center. Be careful not to put a hole in the bailer wall by cutting too deeply. Leave about ½” (1.2 cm) at the very ends for strength.
- Optionally glue both halves together, clamp or wrap with a bike tire inner tube, and allow to dry. Tightly wrap each band with string. A serving knot works well and hides the ends by tucking them under the wraps. Synthetic string can have the ends singed with a lighter to help prevent fraying.
- Drill a hole in the center of each end of the bailer. 3/8″ (1 cm) should do.
- Done! If you didn’t use glue you can try soaking the bailer in water to allow it to swell to close the seam before using.